Integrating GitLab On-Prem with Flyingduck
Flyingduck allows you to connect your GitLab On-Premise instance for automated security monitoring, code scanning, and continuous compliance tracking.
Before you begin, ensure your GitLab On-Prem instance is already set up and accessible.
Access the Integration
- Sign in to the Flyingduck portal as an administrator.
- In the sidebar, navigate to Administration → Integrations.
- Under the available integrations list, locate GitLab On-Prem and click Integrate.

Runner App Integration
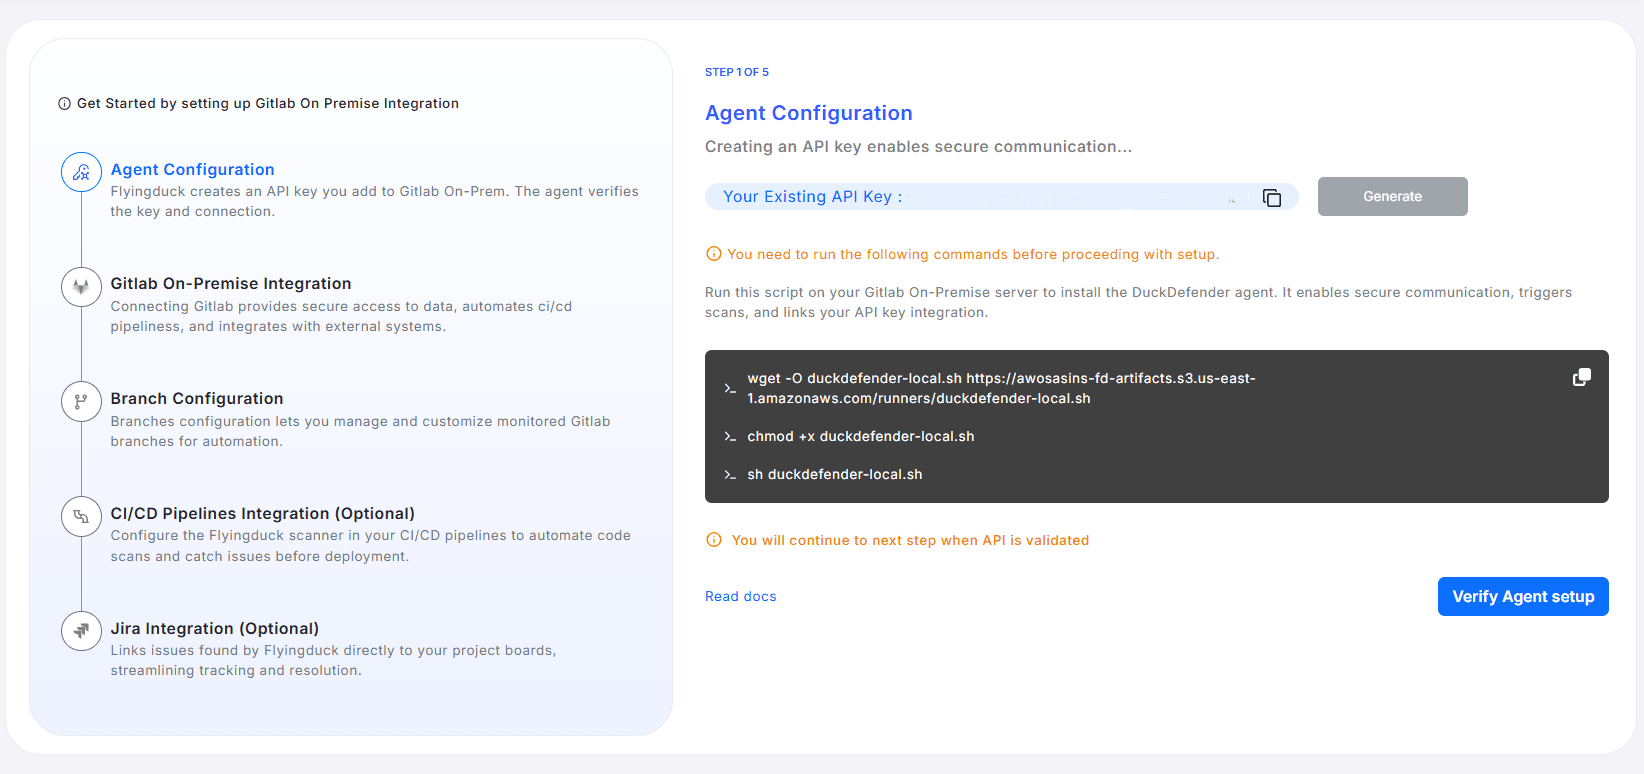
Step 1: Agent Configuration
The first step in integrating GitLab On-Prem with Flyingduck is to configure the Flyingduck Agent.
This agent securely connects your on-premise GitLab environment with Flyingduck, enabling data synchronization and automated scanning.
Generate and Configure API Key
-
During the Agent Configuration step, Flyingduck automatically generates an API Key that uniquely identifies your integration.
This key is required to authenticate communication between your GitLab server and Flyingduck.- If you already have a key, it will be displayed under Your Existing API Key.
- Click Generate to create a new one if needed.
-
Copy the generated API Key securely — you’ll use it while installing the agent on your GitLab server.
Install the Flyingduck Agent
To link your GitLab On-Prem server with Flyingduck, execute the following commands on your GitLab server terminal:
wget -O duckdefender-local.sh https://awosasins-fd-artifacts.s3.us-east-1.amazonaws.com/runners/duckdefender-local.sh && chmod +x duckdefender-local.sh && sh duckdefender-local.shThese commands:
- Download the DuckDefender Agent installer.
- Grant execution permission to the script.
- Run the installer to set up a secure connection between Flyingduck and your GitLab instance.
Ensure you run the above commands on the same server where your GitLab On-Premise instance is hosted.
Validate the Agent Setup
Once the installation is complete:
- Return to the Flyingduck portal.
- Click Verify Agent Setup to validate the connection.
If the validation is successful, Flyingduck will confirm that your agent is correctly installed and authenticated, allowing you to proceed to the next step.
You’ll only be able to continue once the API key is successfully validated.
Step 2: GitLab On-Premise Integration
After completing the Agent Configuration, the next step is to connect your GitLab On-Premise instance with Flyingduck. This integration allows Flyingduck to securely access your repositories, automate code scans, and synchronize CI/CD workflows.
Enter Connection Details
- Select Protocol:
Choose the correct protocol (
https://orhttp://) from the dropdown menu.
If the protocol is not selected correctly, the connection will fail with an error.
-
Enter Domain: Provide only your GitLab On-Premise domain name (do not include the protocol). Example:
gitlab-on-premise.example.com -
In the Personal Access Token field, provide a valid access token generated from your GitLab account.
Reference: Official GitLab Documentation – Create a Personal Access Token (opens in a new tab)
Ensure your Personal Access Token includes the following permissions(Scopes):
- read_api
- read_repository
- read_user
You won’t be able to view this token again after leaving the page. Save it securely before proceeding.
Verify and Continue
- Paste the GitLab On-Prem URL and Personal Access Token in the Flyingduck portal.
- Click Continue to validate your connection.
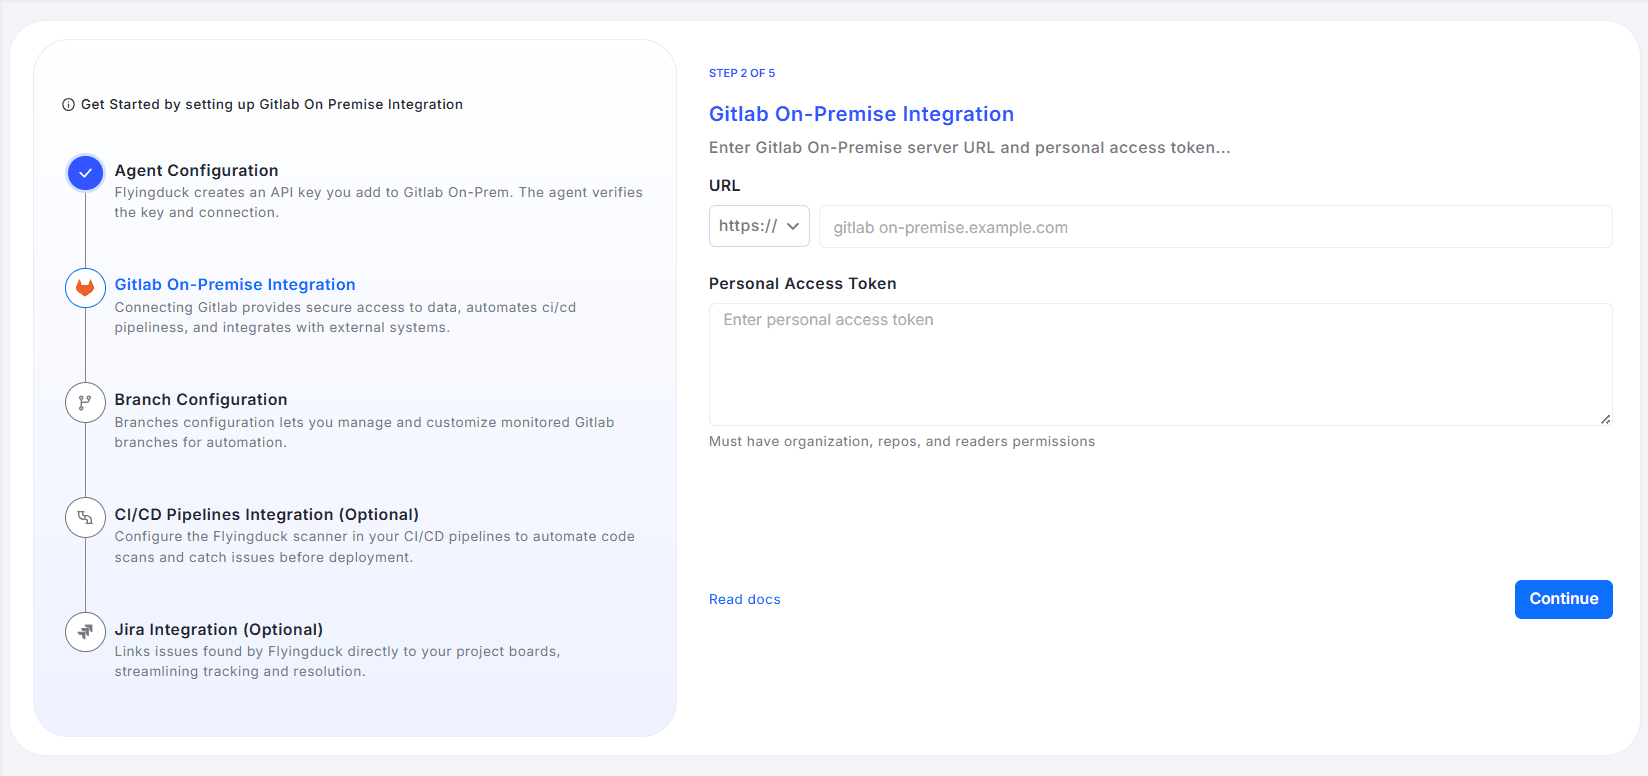
If the credentials are valid, Flyingduck will confirm a successful integration and move you automatically to the next setup step — Branch Configuration.
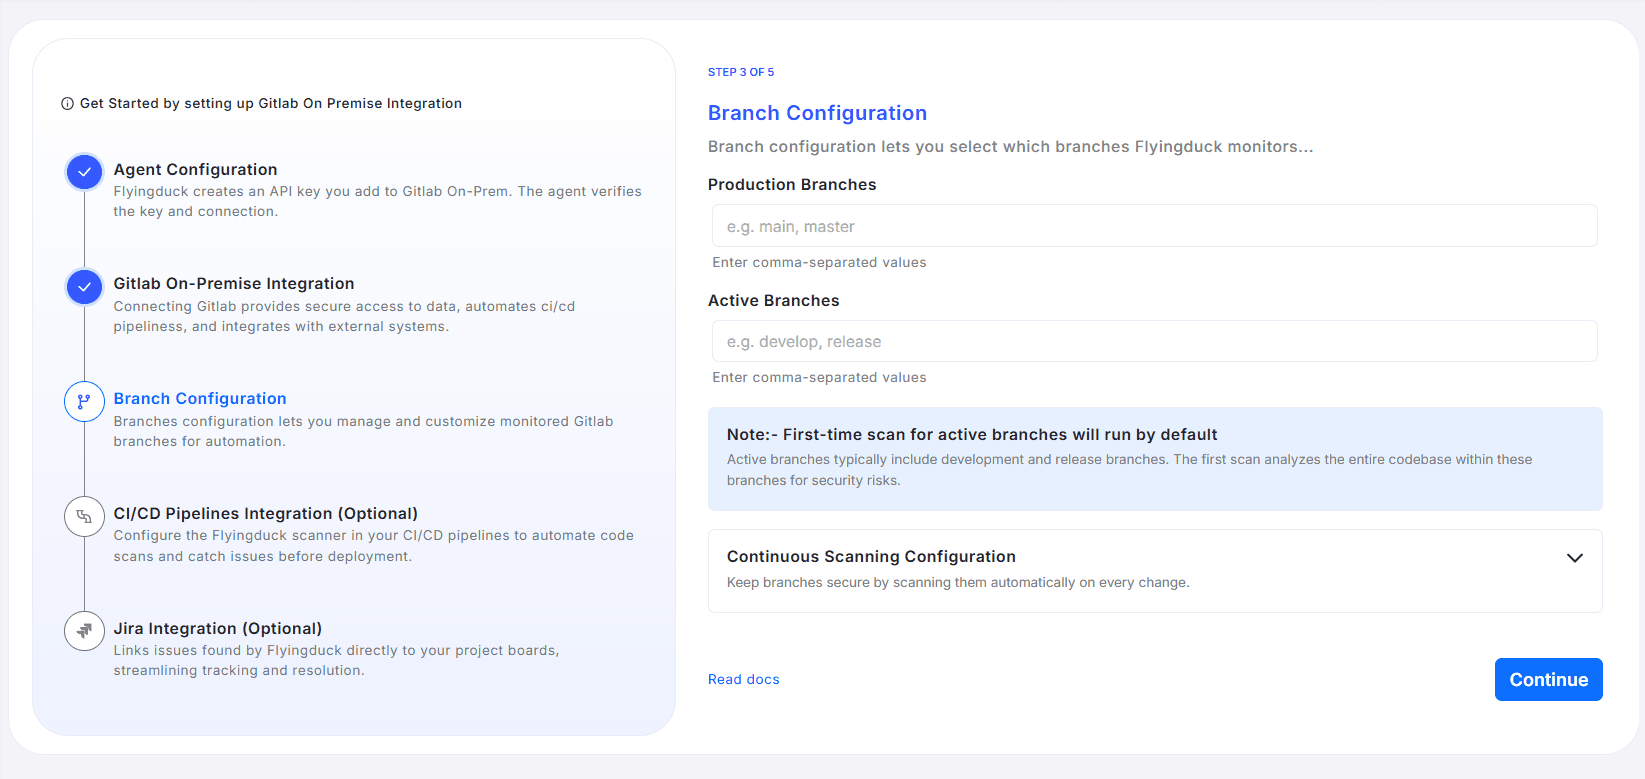
Step 3: Branch Configuration
Branch configuration allows you to define which GitLab branches Flyingduck should monitor and scan for security vulnerabilities. This setup ensures your codebase remains secure across both production and development workflows.
Branches can be categorized into two main groups: Production and Release. Branches such as main, master, or any pre-production branches are included in the Production category. Branches like release, staging, or testing belong in the Release category. All other branches that are not part of these categories are treated as feature branches by default.
This configuration allows you to prioritize important branches and gain better visibility into your development workflow. Flyingduck will scan the configured branches and track all unique issues found. With this setup, you can monitor how many issues are present at each stage and how many are resolved before reaching production.
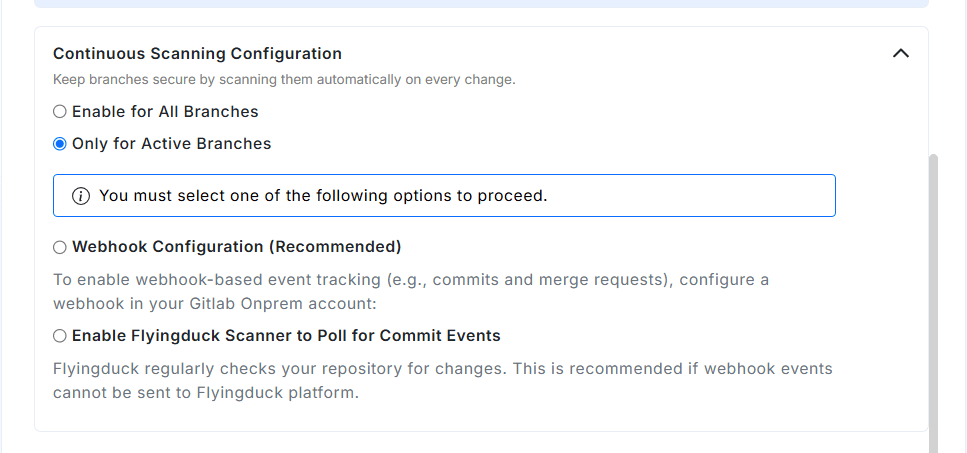
Continuous Scanning Configuration
Expand the Continuous Scanning Configuration section to enable automatic scanning on every change.
Choose one of the following scanning modes:
-
Enable for All Branches — Triggers automatic scanning for every branch in the repository.
-
Only for Active Branches (Recommended) — Restricts automatic scanning to only the branches defined under Active Branches (Production and Release).
⚠️ You must select one of the above options to proceed.
Event Tracking Method
Select how Flyingduck should detect new commits and code changes:
-
Webhook Configuration (Recommended) Use webhook-based tracking for real-time scanning when commits or merge requests occur. You’ll need to configure a webhook in your GitLab On-Premise account pointing to Flyingduck.
Steps to Create a Webhook:
- In your GitLab On-Premise instance, navigate to: Group → Settings → Webhooks
- Click Add new webhook
- In the URL field, enter:
https://api.flyingduck.io/listeners/v1/gitlab-
In the Secret token field, paste your Flyingduck API Key.
-
Under the Trigger section, select the following events:
- Push events
- Project events
- Subgroup events
-
Click Add webhook to save the configuration.
Once added successfully, Flyingduck will start receiving event data from your GitLab On-Premise instance for automated scanning and monitoring.
-
Enable Flyingduck Scanner to Poll for Commit Events Flyingduck periodically checks the repository for updates. This option is recommended when webhook events cannot reach Flyingduck — for example, due to whitelisting rules, firewall restrictions, or network policies.
No additional setup is required. Simply select this option, and the configured Flyingduck Agent will automatically handle the polling and scanning process. Commit scans will be performed only for the branches specified under Active Branches.
After selecting your preferred scanning and tracking options:
- Review your branch entries.
- Confirm your scanning mode and event-tracking method.
- Click Continue to move to the next step — CI/CD Pipelines Integration (Optional).
Maintaining well-defined branch configurations ensures Flyingduck continuously monitors your repositories for new security vulnerabilities — keeping both production and development code safe.
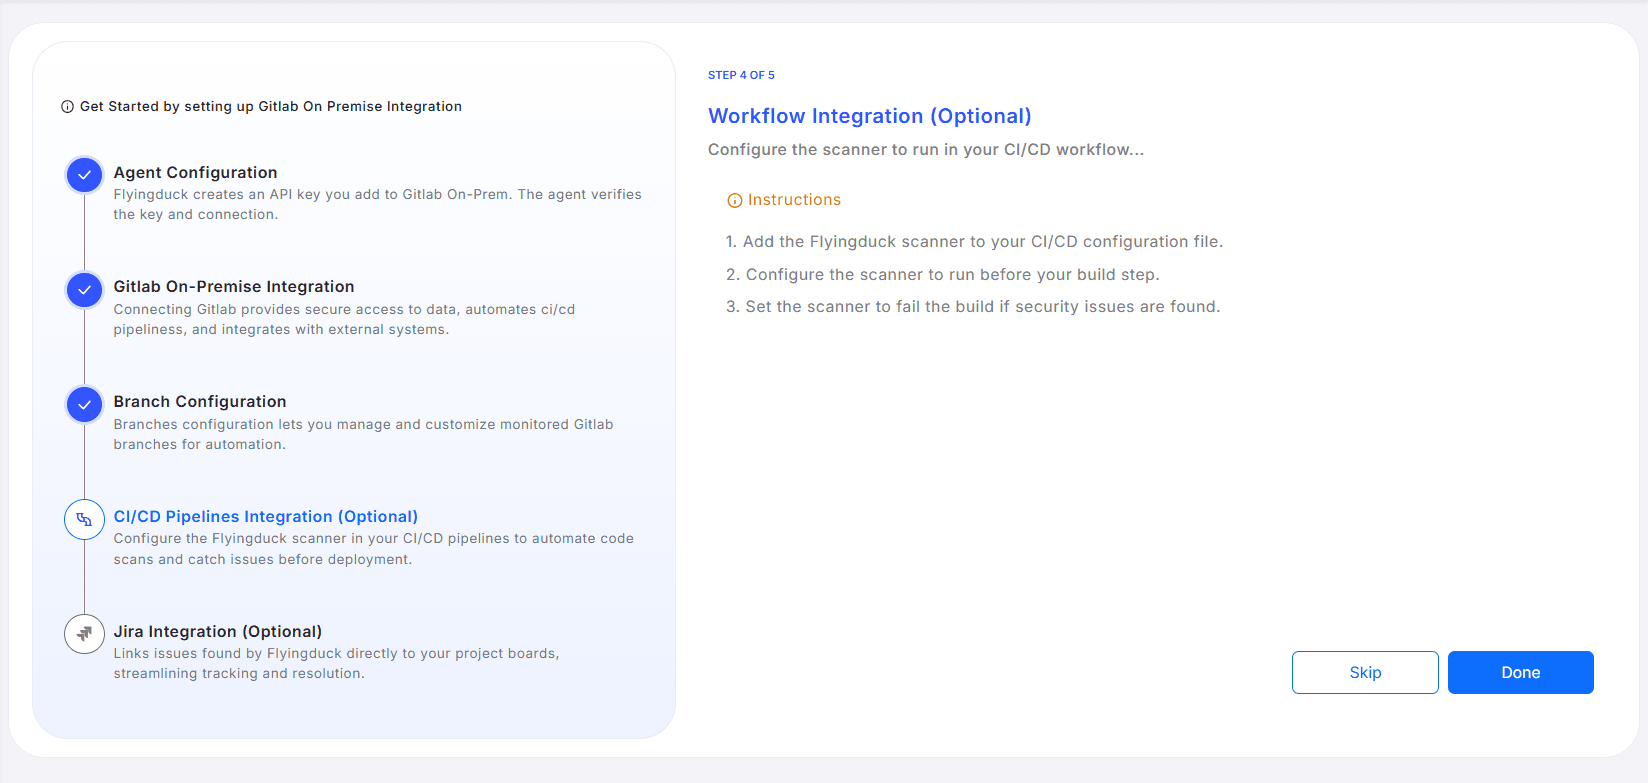
Step 4: CI/CD Workflow Integration (Optional)
Flyingduck can be integrated into your GitLab CI/CD pipelines to automatically scan code during pipeline execution. This ensures that potential security issues are identified early in the development process, preventing vulnerabilities from reaching production.
Step 1: Add FD_API_KEY as a Variable
Add your Flyingduck API Key as a variable either at the Group level (recommended for multiple projects) or at the Project level.
To add a variable:
-
Go to your GitLab project or group
-
Navigate to Settings → CI/CD
-
Expand the Variables section
-
Click Add variable
-
Fill in the following details:
- Key:
FD_API_KEY - Value: Your Flyingduck API key
- Type:
Variable(default) orFile
- Key:
-
Click Save variable
💡 Tip: Group-level variables are inherited by all projects within the group unless overridden at the project level.
Step 2: Add the Flyingduck Scanner to .gitlab-ci.yml
image: docker:stable

services:
  - docker:dind

variables:
  DOCKER_TAG: "flyingduckio/duckdefender:latest"
  FD_API_KEY: "$FD_API_KEY"

stages:
  - build_and_run

DuckDefender:
  stage: build_and_run
  script:
    # Pull the Docker image
    - docker pull $DOCKER_TAG

    # Run the Docker container with environment variables
    - docker run \
        -e FD_API_KEY="$FD_API_KEY" \
        -e CI_COMMIT_SHA="$CI_COMMIT_SHA" \
        -e CI_COMMIT_BRANCH="$CI_COMMIT_BRANCH" \
        -e CI_COMMIT_BEFORE_SHA="$CI_COMMIT_BEFORE_SHA" \
        -e CI_COMMIT_AUTHOR="$CI_COMMIT_AUTHOR" \
        -v $CI_PROJECT_DIR:/src "$DOCKER_TAG"

# Define the job for specific branches
main:
  only:
    - main
  extends: DuckDefender
Step 3: Configure the Scanner
- Ensure the scanner runs before the build step in your pipeline.
- Optionally, configure the job to fail the build if any security vulnerabilities are detected.
Step 4: Verify Integration
Once the configuration is complete, Flyingduck will automatically scan your source code during each pipeline run. Detected vulnerabilities will be reported in the Flyingduck dashboard, helping teams maintain secure and compliant development workflows.
Step 5: Jira Integration (Optional)
Flyingduck can be integrated with Jira to streamline issue tracking by automatically creating and linking issues discovered during scans to your Jira project boards. This ensures efficient management and resolution of vulnerabilities.
Setup Steps:
- Enter your Jira domain (e.g.,
https://your-org.atlassian.net) - Enter the email ID associated with your Jira API token
- Enter your Jira API token
- Click Test Authentication to verify the connection, or **Skip